Wednesday 20 April 2016

A Plain White Tee Transformed: Blugirl Poppy Tee Makeover

I've been spending time on Pinterest, again, and I've come across some truly amazing pieces that have really captivated my interest, like this stunning top by Blugirl. The simple structure of the boxy top is transformed by the vibrant floral embellishment. I clicked my way over to their site, and they have some truly gorgeous pieces, but they're a bit out of my wallet's reach. Regardless, inspiration had struck, and I decided I'd make my own version. Read on if you're interested in making one of your own ;)

Source: the web


Materials
  • White tee shirt
  • Organza fabric in red color
  • Satin fabric in black color
  • Kraft paper
  • Fabric paint in black color
  • Textile medium
  • Paint brush
  • Flower and stem stencils 
  • Candle
  • Lighter
  • Container


While perusing the aisles at Michael's I found this white tee (it's got the boxy look, and you can't go wrong for $2.99!); I had some leftover red organza to make the flowers and some leftover satin in black to make the receptacles (bases) of the flowers. I used kraft paper to make the stencil of the flower's stems. Make sure to wash and dry the tee shirt before starting the project; most of the time they're not pre-shrunk and that can throw off your work after the first wash.


The flower stencil on the left is the one I used to make the "base" of the flower. As you can see there are three size of flowers; I just wanted to have one small, one medium and one large, but feel free to experiment. The single petals and receptacles were made out of cardboard and were used to make the "top" of the flower.


I cut three full flowers (small, medium, large) and burned the edges of each flower with a lighted candle to prevent fraying. It's just a small burn around the edges.


These are the individual petals and the receptacles after I burned them with the lighted candle. Now that I had all the pieces needed to make the flowers, I was ready to assemble them onto the shirt. 


Since I was trying to give a three dimensional look to my flowers, I took the whole flowers and folded them in half. I used a pin to keep it from opening; organza is somewhat stiff and it can be tricky to manage it sometimes but I think it's the most suitable fabric to make this kind of flower.


Next, you fold the flower in half once more and pin it in place to keep the flower from opening.


I placed my first flower right at the top of the shirt, close to the shoulder. The others were arranged going down the shirt on the same side.


When all my whole flowers were pinned to the top of the shirt, I sewed a few stitches on each of them to secure them. I used my sewing machine but you can also stitch by hand, if you prefer.


The next step was to place the single petals on top of the attached whole flowers. I used four petals for each flower: I placed one on either side of the whole flower and two in the middle (over the whole flower) and pinned them to keep them in place. Then, I gave them a few stitches to secure them onto the tee shirt.

Next came the receptacles at the base of the flowers, as shown in the picture above. Pinned, then sewn in place.


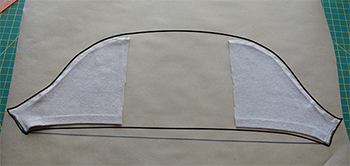
Once the flower portion was done, I placed and ironed the stencil of the stems on top of the shirt making sure that each stem met the base of each flower. The 
Kraft paper sticks to the tee shirt after you iron it. Time to do some painting!


I added textile medium to my black paint. This gives the acrylic paint the same properties as fabric paint; it goes smoothly onto the fabric and you don't get any stiffening of the fabric. I usually add two parts paint to one part textile medium. 


I applied the paint very carefully with a small paint brush; the Kraft paper should form a good seal, but I wanted to avoid any possible "bleeding". I allowed it to dry for 24 hours, then threw it in the dryer for 15 minutes because it was only an small area that I needed to heat set, wait about a week before you wash the shirt again.


And now for the big reveal: A plain white tee transformed! I love the look of the vibrant red poppies on the clean white background, and the technique used to make the flowers gives the top a whole new "dimension" (hehe ;))
It seriously is a wonderfully versatile top; you can pair it with a cute swing skirt and flats, or dress it up with a sleek black blazer, dark wash jeans and strappy heels. And the choice is yours when it comes to the colour of the flowers. What colours would you use?


Wednesday 6 April 2016

Inspired Transformation: Ryu Floral Rain Top

The internet can be a great source for inspiration. I'm an avid online shopper...window shopper, that is. I love to browse through the styles available online, and most of the time this serves as the catalyst for some new creation, because maxing out a credit card is not an option (or sometimes there's nothing left in my size, or shipping to my home is just ridiculous!).


This lovely little top was available online some time ago from the brand Ryu, and while the original is lovely, I wanted my version to have a pop of vibrant colour, perfect for warm weather wear :)

If you happen to be  inspired to make one of your own, just follow these simple instructions ;)
 
You'll need:
  • A basic tee shirt
  • Fabric of your choice for the new sleeves (about 0.5 meters)
  • Matching threa
  • Measuring tape
  • Pins 
  • Kraft paper
  • Marker


The tee shirt that I am using for the project is a basic ribbed cotton crew neck tee; it cost me $5.00. The fabric for the sleeves was left over from another project; it's a stretchy lace knit.


Cut off the sleeves from the t shirt. You can now use one of the sleeves to make the pattern for the new sleeve you're creating. Mark the front and back of the sleeve with a marker or make notches with your scissor, so you know where is the front and the back for when you attach the new sleeves to the shirt. I like to make one notch in the front and two notches in the back of the sleeves.


Cut the seam of the sleeve open, fold the sleeve in half and cut it in two pieces, as shown in the picture above.


Cut a square piece of Kraft paper to draw out the pattern for the the new sleeves. I used a 20" by 10" piece. Next I drew a horizontal line 17.5" long on the paper. That line is where the two pieces of sleeve are going to be resting.


Place the two pieces of sleeve on the Kraft paper, right on top of the line that you drew, make sure you place them exactly as shown above.  I am going to be making a puff sleeve, so the distance between the two halves is the extra room that we need to make it a puff sleeve. I left a distance of six inches, you can give it more or less, depending on how puffy you want your sleeve. Trace the sleeve all around with a marker and cut.


Ta-da! This is the pattern for the new sleeve. Now, you draw the notches in the pattern: one notch for the front of the sleeve and two for the back of the sleeve. The dots on the pattern indicate where to begin and end the cap gathering (to create the "puff").


Fold the fabric with right sides together, place the pattern on top, pin and cut. Don't forget to transfer the notches and the dots onto your fabric sleeves.


These are the new sleeves that will be sewn onto the tee shirt. The next steps are to gather the cap of the sleeve, stitch the seam of each sleeve together and make a casing for the elastic at the lower edge of the sleeve.


You can gather the cap of each sleeve by machine or by hand. If machine basting, pull bobbin threads to gather, as shown in the picture above.


With right side together stitch sleeve seams. Do the same for both sleeves. Since I was using a stretch fabric, I used my serger, but I could have also used my sewing machine with a zig zag stitch length of 1.5 and a width of 5.


Turn the sleeve right side out and this is what it looks like after you have stitched the seam.


Make a casing of half an inch in the lower edge of the sleeve for the elastic, leave a half an inch opening to insert the elastic. I used a 1/4 of an inch wide elastic.


With right sides facing, pin each sleeve to armhole edge matching the back and front notches of the sleeves with the back and the front of the shirt. The gathering must be distributed evenly to obtain a nice puff sleeve. Stitch them together using a serger or sewing machine.


This is what the shirt looks like after you have sewn the sleeves into the shirt. Now, measure your upper arm around and cut a piece of elastic with that measure plus one inch for finishing the ends. The elastic has to fit upper arm comfortably. Pull elastic into lower edge of each sleeve, using a safety pin. Sew ends of each elastic together and sew the half an inch opening closed.


For the flower, cut 2.5 inches squares of the fabric and colors of your choice, use the flower template to cut out the flowers and burn the edges with a candle, do it  carefully because this flowers are very small and you only want to burn the edges. I chose satin in pink and light bronze colors and organza in a creme color. Make as many flowers as you want and place them in any way you want on your shirt.


These are the flowers, cut and burnt and ready to be attached to your shirt.


This is the final product! A nice shirt with puff sleeves and cute flowers to match your shirt. ;)


Friday 11 March 2016

DIY Easter Eggs

Easter eggs are a quintessential part of the Easter holiday. I recall the craft sessions (at school or at home) that involved "decorating" hard boiled eggs by making designs on the shells with wax crayons and later dip-dyeing the eggs into the prepared dye baths to reveal the masterpieces of my youth. Easter egg decorating has clearly come a long way since my childhood, as you can see in these interesting techniques I found while scouring the web for new ideas to inspire my Easter eggs this year. There's everything from more natural dye sources, to unique decoupaged eggs, to the glitzy and sparkly glitter Easter eggs!
Which technique(s) will you try out this Easter?


Glitter Easter Eggs

Herb Stencil Easter Eggs

Decoupage Easter Eggs

Easy Watercolor Easter Eggs

Marbled Easter Eggs

Natural Dyed Eggs

Kool-Aid Easter Eggs

Robin Eggs


Wednesday 9 March 2016

Delicious Easter Treats


No holiday is complete without its requisite repertoire of yummy goodies that not only taste great, but are pleasing to the eye. It's something that everyone looks forward to, young or old (but the kiddos are especially fond of the sweet treats they get to indulge in!). I've scoured the web for some Easter delights that are whimsical, yummy and quite easy to make. Let me know in the comments below which ones you tried out and how you rate it!

Easter Homemade Gumdrops
Easter Colorful Cake Balls
Easter Basket Cupcakes
Easter Egg Chocolate Doughnuts
Bunny Sandwich Cookies
Petite Easter Brownies
Easter Chocolate Cupcakes
Mini  Marshmallows  Easter Bars
Easter Bunny Cake
Skateboarding Bunnies
Oreo Bunny Pops
Easter Cake
Bunny Tail Cake Balls